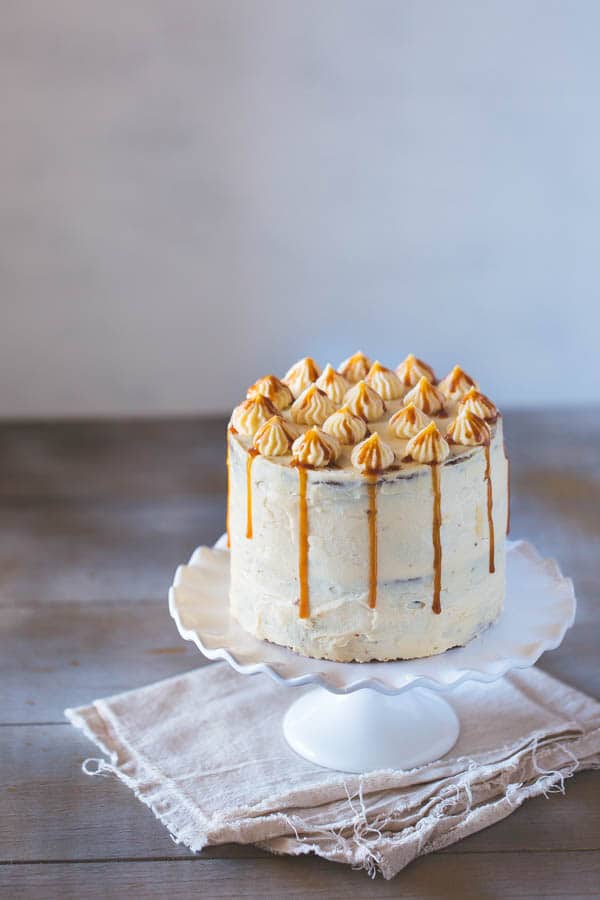
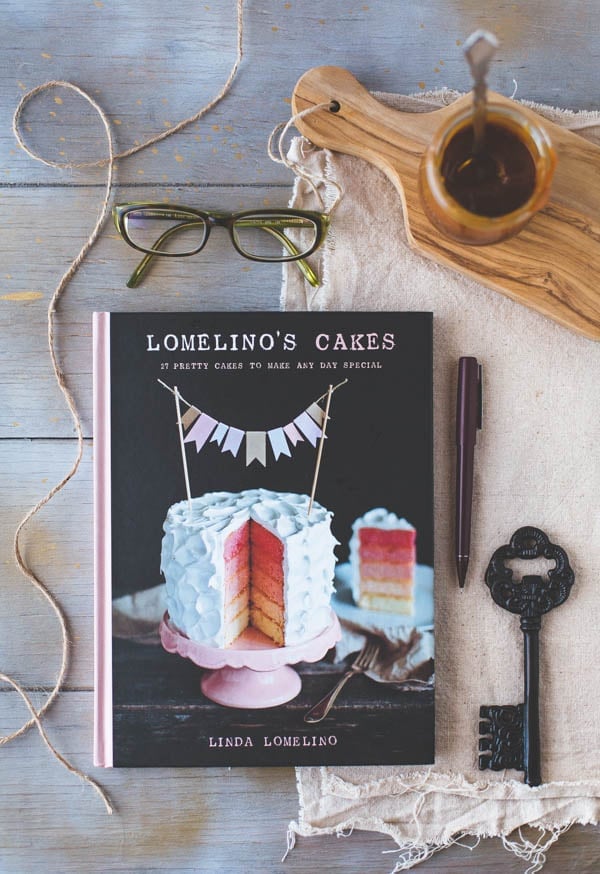
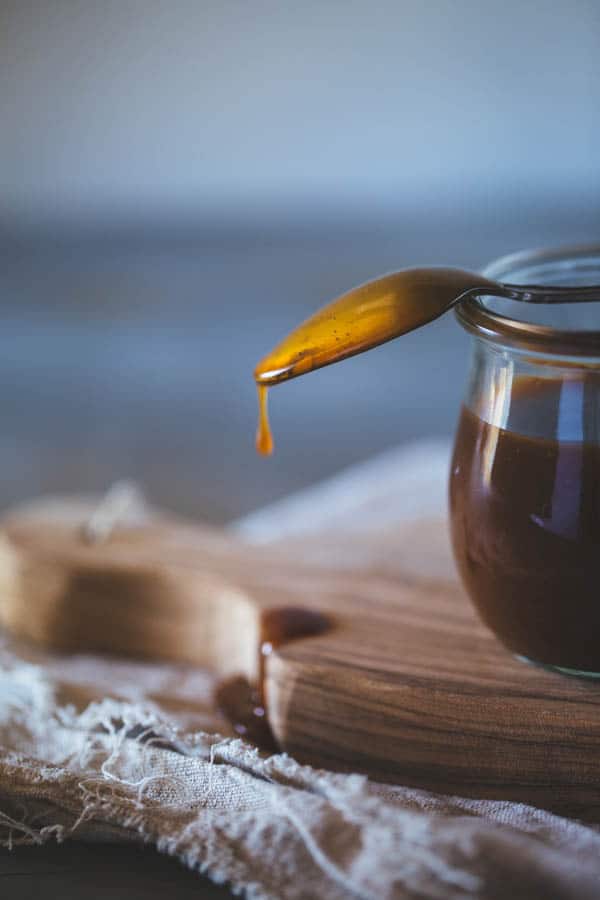
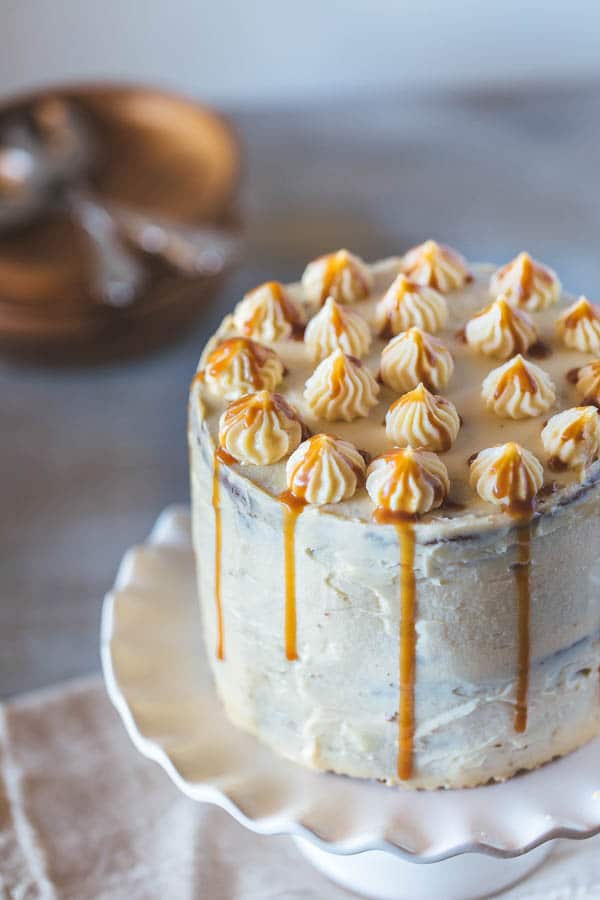
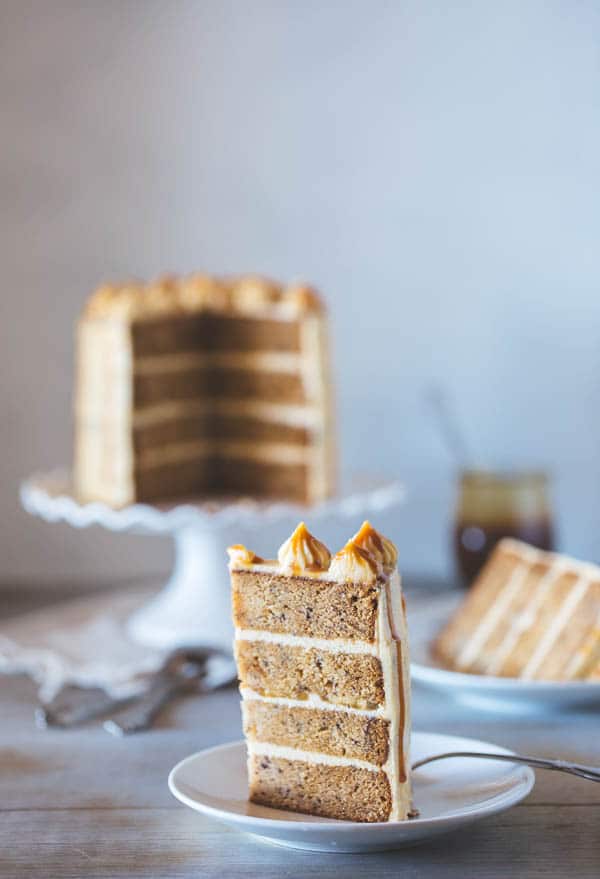
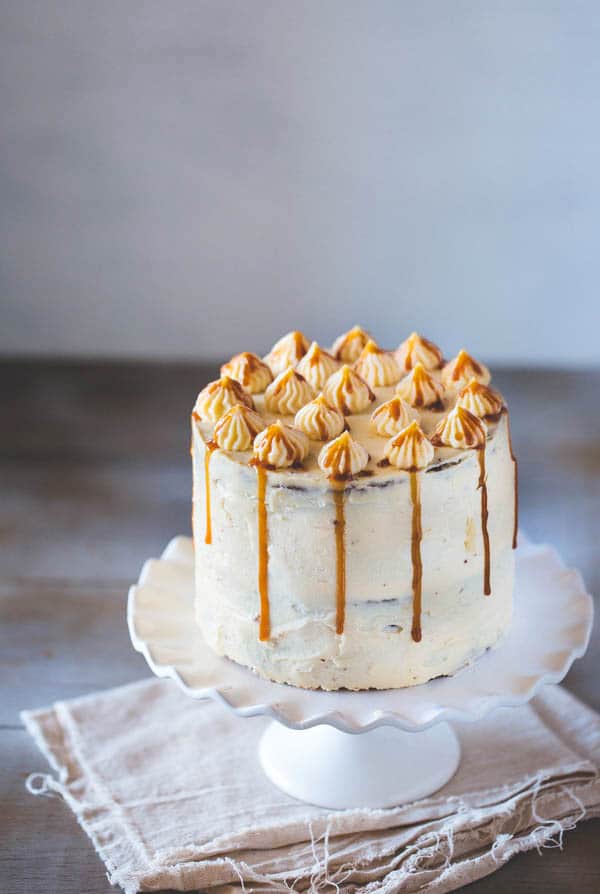
Though when it comes to baking a cake, I usually go for a chocolaty recipe, this year I wanted to try my hand at making a fruity one. And I am glad I did, because this Banana Cake with Caramel Frosting ended up being out-of-this-world delicious. Recipe for this delicious cake comes from Linda Lomelino’s cookbook Lomelino’s Cakes. If you are not familiar with her, she is the author and photographer behind one of my favorite food and photography blogs, Call me Cupcake. I bought her book back in November right after it came out and have been baking from it ever since. If you are like me, a fan of small cakes (mostly 6-inch), this book is a great source that is full of creative and beautiful cake recipes that you can easily make in your own kitchen. There are four stages to making this cake. And what I love about it is that you can save time by making the first two stages a day in advance. Then on the day you are planning to serve it, all you have to do is to make the frosting and assemble it all together. First stage is making the caramel. I know many people, who find it scary to make caramel at home, because of the crazy bubbling that happens when you add the heavy cream and butter to scorchingly hot melted sugar. While I can totally relate to that, if you follow the instructions and never (EVER!) take your eyes off of the sugar after it turns brown, you will see that with this recipe it is not that difficult or scary. Yes, it is hot, but as long as you are careful and start stirring at the right time, you’ll have a jar of homemade caramel in no time. You can make it a couple of days in advance and keep it in the fridge until you are ready to use it. The second stage is making the batter for the cake. It is as simple as mixing butter, sugar, and eggs, and then fold the dry ingredients into the mixture. To save time, I made it a day in advance, covered it with plastic, and kept it in the fridge until I was ready to use it. In her book, Linda suggests that you can freeze the baked cakes after they come to room temperature for later use. As long as they are tightly covered with stretch film, you should be good to go. The third stage is making the frosting. The frosting is made by mixing butter, crème cheese, powdered sugar, and some of the caramel sauce you made earlier. I love the fact that it uses a combination of crème cheese and butter, because the end result is somewhat lighter and fluffier than just using butter. To get the best results, I recommend having all the ingredients at room temperature. Also sifting the powder sugar is always a good idea when making frosting. I’d recommend making this on the day of serving so that it will be smooth and fresh. The last stage is assembling it. As I made everything (except frosting) a day earlier, I took them out of the fridge in the morning so that they can be at room temperature by the time I am ready to assemble it. The process of putting it all together was pretty simple. The only part that required a little bit of an experience was cutting the cake horizontally into two equal parts. And believe me, even as a regular baker I find this part somewhat intimidating. However, I learned that (1) it is not the end of the world if they are not equal, and (2) if you do it slowly and use a ruler along the way you are more likely to get two equal pieces. Once I had 4 layers, the rest was easy. I frosted each layer, and at the end the whole cake with the frosting. I used a star tip nozzle to decorate the top. To give it a little bit of color, I drizzled each star with a drop of caramel. One thing I will do next time is to place thinly sliced bananas in between the layers to enhance the banana flavor.
Other Cake Recipes You Might Like:
Almond Flour Carrot CakeAlmond Flour Strawberry CakeChocolate Bundt CakeAlmond Flour Banana Cake RecipeNeed more inspiration? Check out cake recipes & desserts
Recipe adapted (with changes) from the cookbook Lomelino’s Cakes.