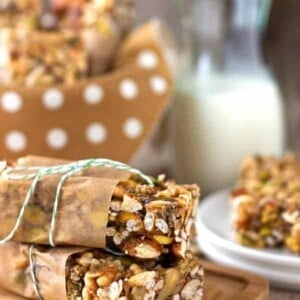
Making my homemade version of healthy nut bars at home is easy. You can make them in less than 20 minutes. And as long as they are individually wrapped in wax (or parchment) paper in an airtight container, they keep fresh for 5 to 6 days. The best part of it is that you can use whatever nuts and dried fruit you have at home.
What is a kind bar?
Kind Bars are a brand of breakfast bars that are mostly sold in supermarkets and coffee shops. Made up of nuts, dried fruits, sugar, and other various granola ingredients, they are considered as one of the most popular snacks in the US. As their popularity increased, they extended their arsenal and added different types of KIND bars, ranging from crunchy breakfast bars to nut butter protein bars. My version here, the following homemade KIND bar copycat recipe, follows a similar set of ingredients and combines cereal, nuts and dried fruit for a chewy granola bar.
Are Kind bars vegan friendly?
Yes, they are. KIND granola bars contain wholesome, familiar ingredients like nuts, dark chocolate and spices.
The formula – How to make Homemade Kind Bars
This quick and easy recipe for homemade KIND bars gives you a formula as simple as mixing together your nuts, fruit and other dry ingredients, heating up the brown rice syrup adhesive that will bind the bars together, and finally letting them cool. Below is my step by step guide to making them at home with substitutions to some of the ingredients used in the recipe so that you can easily create your own version. Step 1: Line an 8×8 baking pan with aluminum foil (you can use parchment paper as well), leaving a couple inches overhanging the sides. You can see a visual of this in the how to video below. Step 2: Mix the dry ingredients below in a large bowl. Below, you will find the ingredients I used along with a few suggestions and tips to help you create your own version.
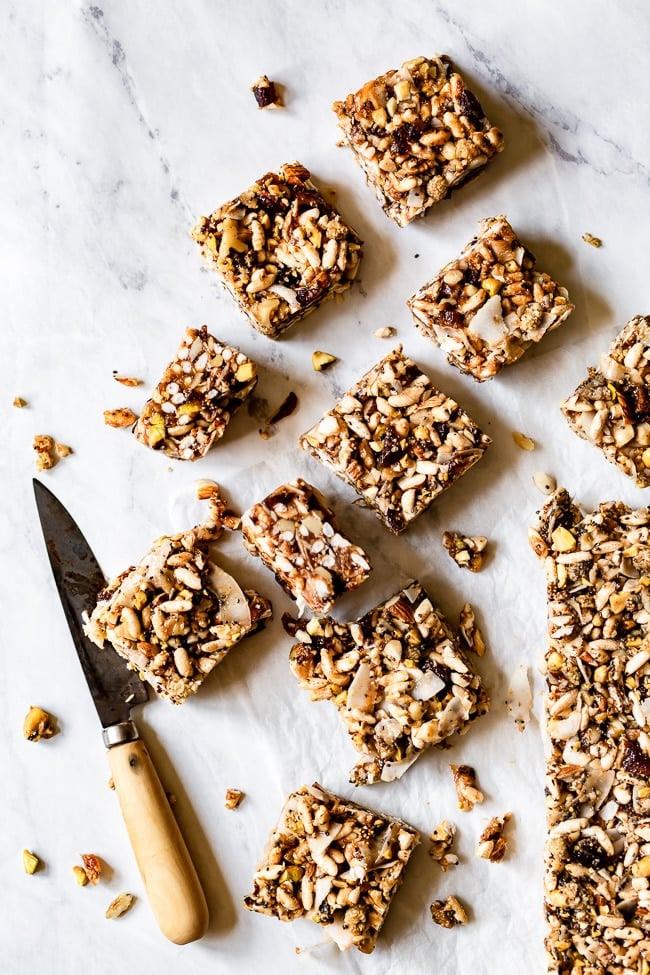
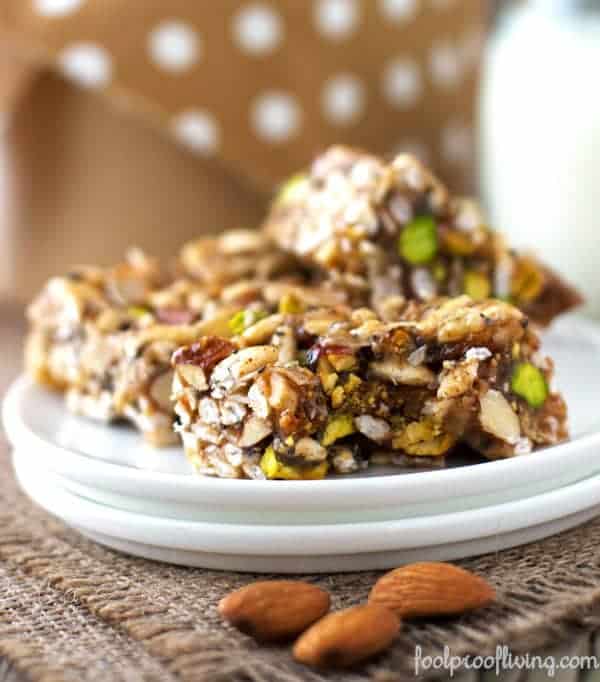
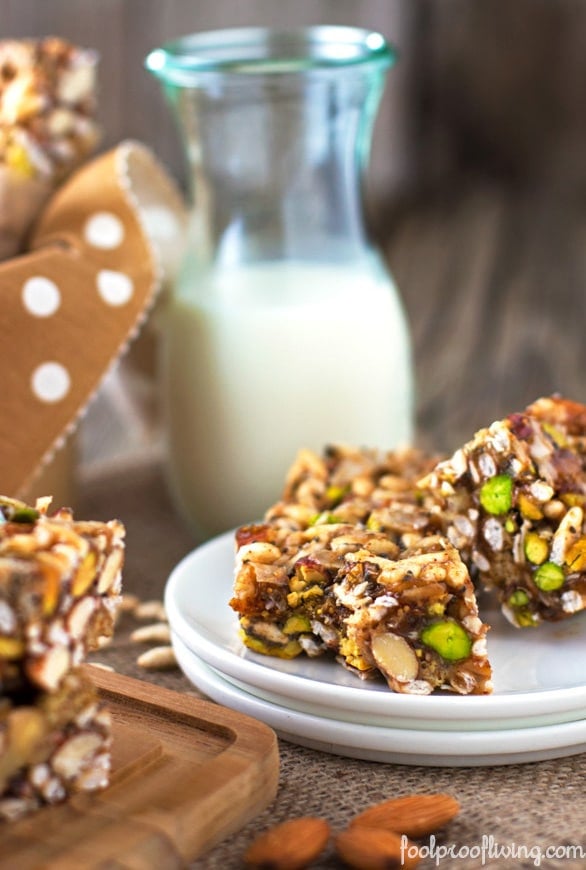
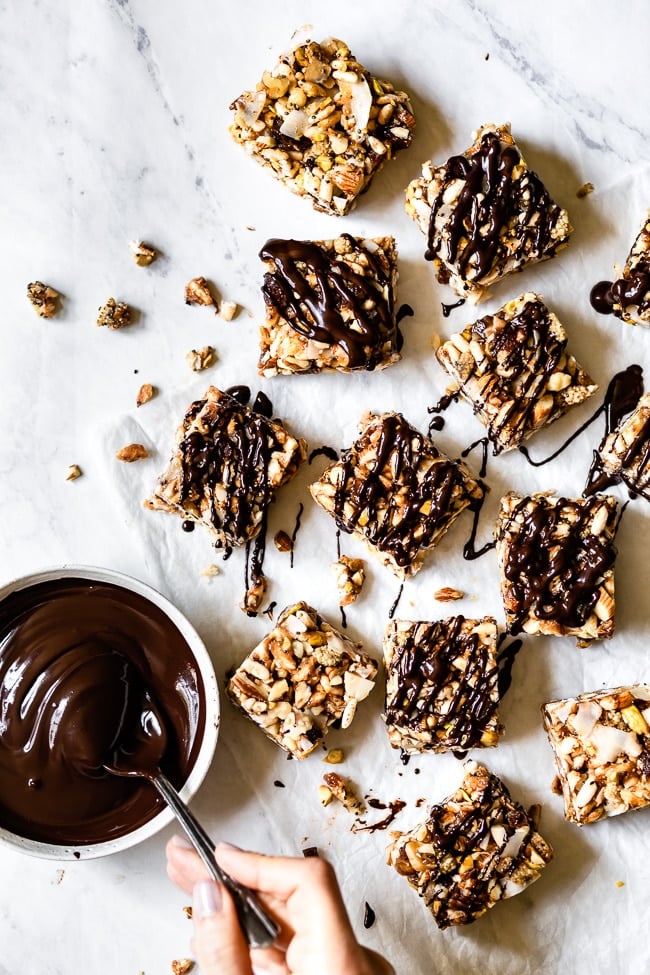
1 ½ cups puff cereal – You can use brown rice cereal (Nature’s Path is my favorite brand (affiliate link)), kamut puffs, or rice puffs would also work.1 ½ cups nuts (preferably unsalted) – I used a combination of walnuts, almonds, and pistachios, but any unsalted nuts you have would work. Cashews, hazelnuts, pecans, etc. would all deliver delicious nut bars.1 cup dried fruit (no sugar added) – I opted for dried apricots, mulberries, and figs, but any combination of dried fruit would work here. Feel free to play with seasonal dried fruits like dried apples and cranberries in the fall and dried cherries and berries in the summer.½ cup shredded coconut flakes (unsweetened) – This is an optional, but I think it gives a great chewy texture to the granola bar.1 tablespoons chia seeds – It is no secret that chia seeds are full of antioxidants, fiber, and vitamins. While I recommend adding them to your granola mixture, if you do not have any at home, you can omit from the recipe.
Step 3: Prep the liquid mixture – Whisk all the ingredients in a small saucepan. Stirring constantly, heat it over medium heat for 2 minutes. It should be a very smooth mixture.
½ cup brown rice syrup: Brown rice syrup is a natural sweetener that has a similar consistency to corn syrup. It is less sweet than sugar and can be used as a substitute when baking or cooking. Most commercial granola bars use brown rice syrup instead of sugar. You can find it at a health food store or online (Lundberg is my favorite brand) – affiliate link¼ cup unsalted nut butter: In the kind bar recipe below I used almond butter, but you can also use peanut butter. To keep it healthy, I always use butters with no sugar, salt, or preservatives.2 tablespoons natural sugar (optional): I try not to add in extra sugar, but if your dried fruit is not enough, you can use additional sugar. If you decide to add sugar, I would recommend natural sugars liked date, maple or coconut sugars. 1/4 teaspoon salt: Salt really enhances the sweet and earthy flavors of the nuts and fruit so do not skip it. I am a big fan of sea salt and that is what I used in this recipe.
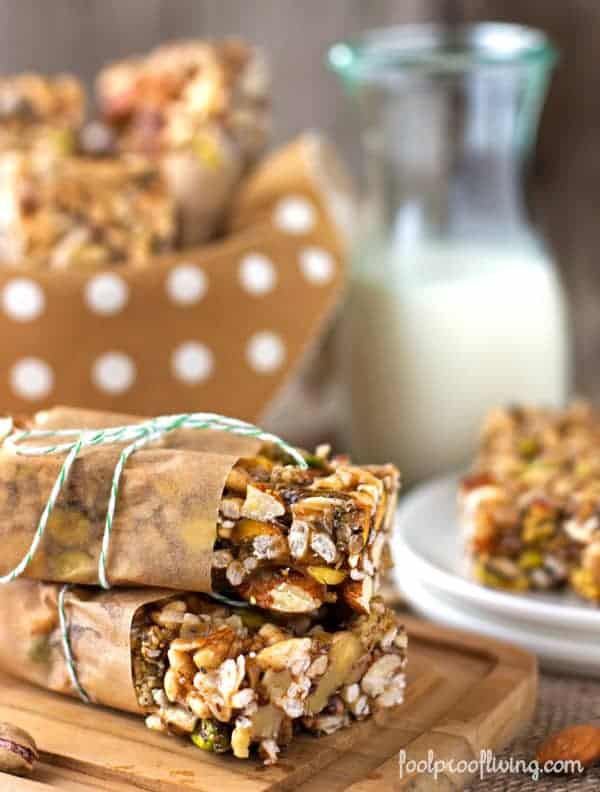
Step 4: Pour the hot mixture over the nuts and fruits mixture. Stir it until all nuts and fruits are coated with the liquid mixture. Step 5: Transfer everything to the lined baking pan. Spread the nut mixture out evenly, flattening it with the bottom of a ramekin or back of a spatula. It will be sticky, but you do want to make it as compact as possible so that it will be nice and thick. Step 6: Place it in the fridge for 2 hours or preferably overnight. Once cooled, use the overhanging foil to lift the block of granola out of the pan. Place it on a cutting board and cut it into bars.
What is the best way to store these Kind energy bars? Can I freeze them?
Once they are fully cooled, I usually slice them into 6 or 9 equal pieces and then wrap them individually with parchment paper (wax paper would also work). Then I place them in an airtight container (Ziploc or a container with a tight lid) to make sure that they have a longer shelf life. Yes, you can keep them in the freezer. Since these copycat KIND bars are mostly made from nuts, they don’t freeze rock hard. As long as they are wrapped individually (like I did in the video) and kept in an airtight container, they would be good for up to 2 months in the freezer. And the best part is that there’s no need to thaw them (or wait for them to come to room temperature) before eating, just grab and go. I hope you agree that making them at home is much more convenient and budget-friendly than spending $4 on a KIND energy bar at the coffee shop.
Can I substitute brown rice syrup with honey?
While honey can be a great substitute for other sweeteners, honey in this recipe will be much too sweet and will not bind the ingredients as strongly as brown rice syrup. The same goes for maple syrup and agave. The combinations for this DIY KIND bar recipe are endless. Use whatever nuts and fruit you have in the house to experiment with your favorite flavors and make the best KIND bars.
Other Healthy Breakfast Options You Might Like
Vegan Zucchini and Walnut BreadQuinoa CrunchSpicy Pumpkin Maple and Tahini GranolaFully Loaded Breakfast BarsVegan Cocoa TrufflesOvernight Steel Cut Oats
This post was originally published in December of 2013, but updated with new photos, a how-to video, and more helpful information to help you as you make your own healthy homemade breakfast bars.